Fixing My Nexus 5 Power Button Issue
What power button problem?
During the month of August, my Nexus 5 phone shut down when it was needed the most: I was in New York, in a rented car, trying to drive to New Jersey during the evening rush hour. Good bye Google Maps Offline. The situation was saved by a working Samsung phone, luckily.
Back at home, plugging in the phone yielded something that many Nexus 5 users have already experienced: instead of charging normally, the phone starts charging and after circa 5 seconds shuts itself down, then starts charging again, shuts itself off 5 seconds later and so on. This video illustrates the point (watch the first 15 seconds):
Now, when this incident happened, this was not the first time I encountered this problem. In fact, there were five Nexus 5 users in my immediate environment and four had suffered the same issues in the last year. So made a plan to repare the phone myself. This post is here to tell how it went.
Buying tools for repairal
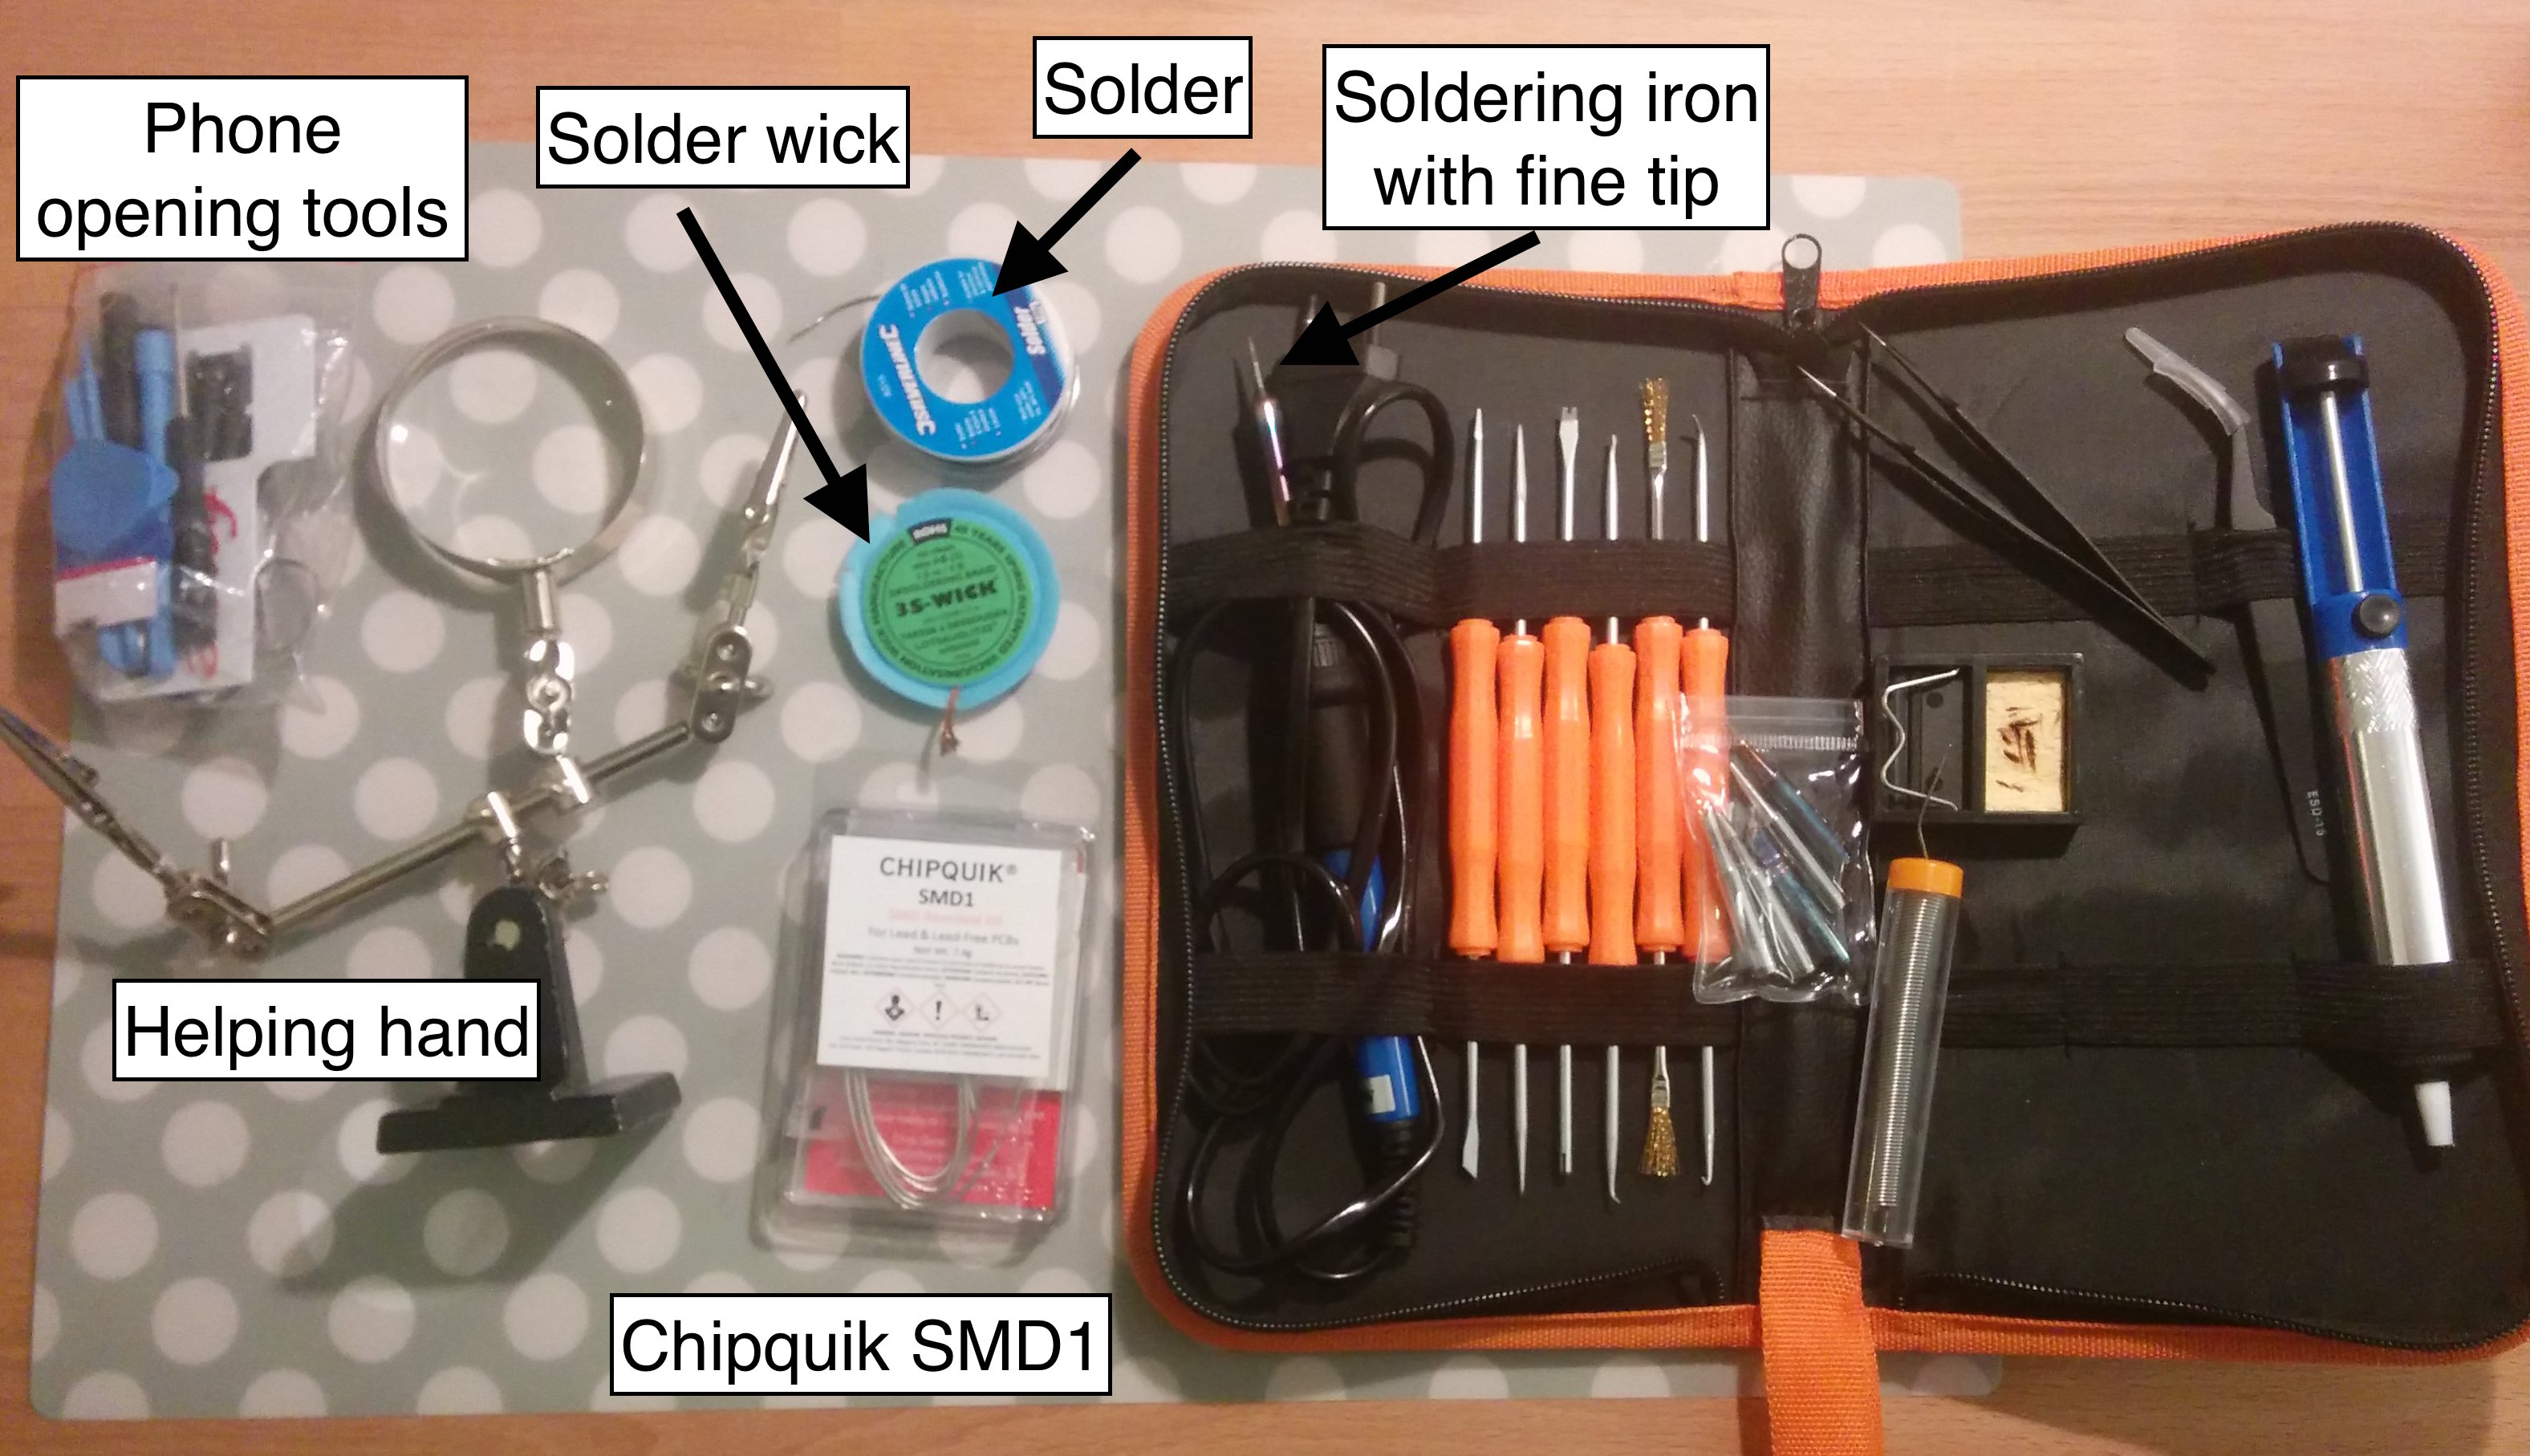
Before doing any repairs, I ordered a soldering iron on Amazon for 25 euros as well as some accessories: solder wick, solder, a helping hand. Also, a phone opening tools. Following the recommendation of a friend who's an expert at desoldering things, I also bought some Chipquik SMD1, a flux and alloy kit that lowers the melting point of the solder it is used on and thus easens removing a component.
You can see an overview of these tools in the picture below:
I bought the replacement power button, a Citizen Electronics LS12 side-push switch, with Aliexpress. It shipped from China and took a really long time to arrive (several weeks). The good surprise was that I hadn't just bought one but five of them. The Nexus 5 buttons are really small, 2.90 x 3.90 x 1.55 mm, which the photo below tries to show (another interesting piece of information about the buttons is their datasheet, which can be seen here).

The internet always helps
Once equipped with the tools described above, I went on to desolder the button. Before doing that, I first searched the internet for good tutorials. I'll just list the ones I found useful below:
- A great comprehensive tutorial https://protyposis.net/blog/replacing-the-nexus-5-power-button/
- A complete tutorial in French https://www.filluzeau.com/2129-nexus-5-qui-redemarre-en-boucle-la-reparation-qui-marche.html
- A G+ post with a good tip on soldering the replacement button on: https://plus.google.com/+MatBettinson/posts/a3H46khnTV5
For videos, I'd really only recommend this one, though there are many others on YouTube. Watch and learn!
Desoldering the button
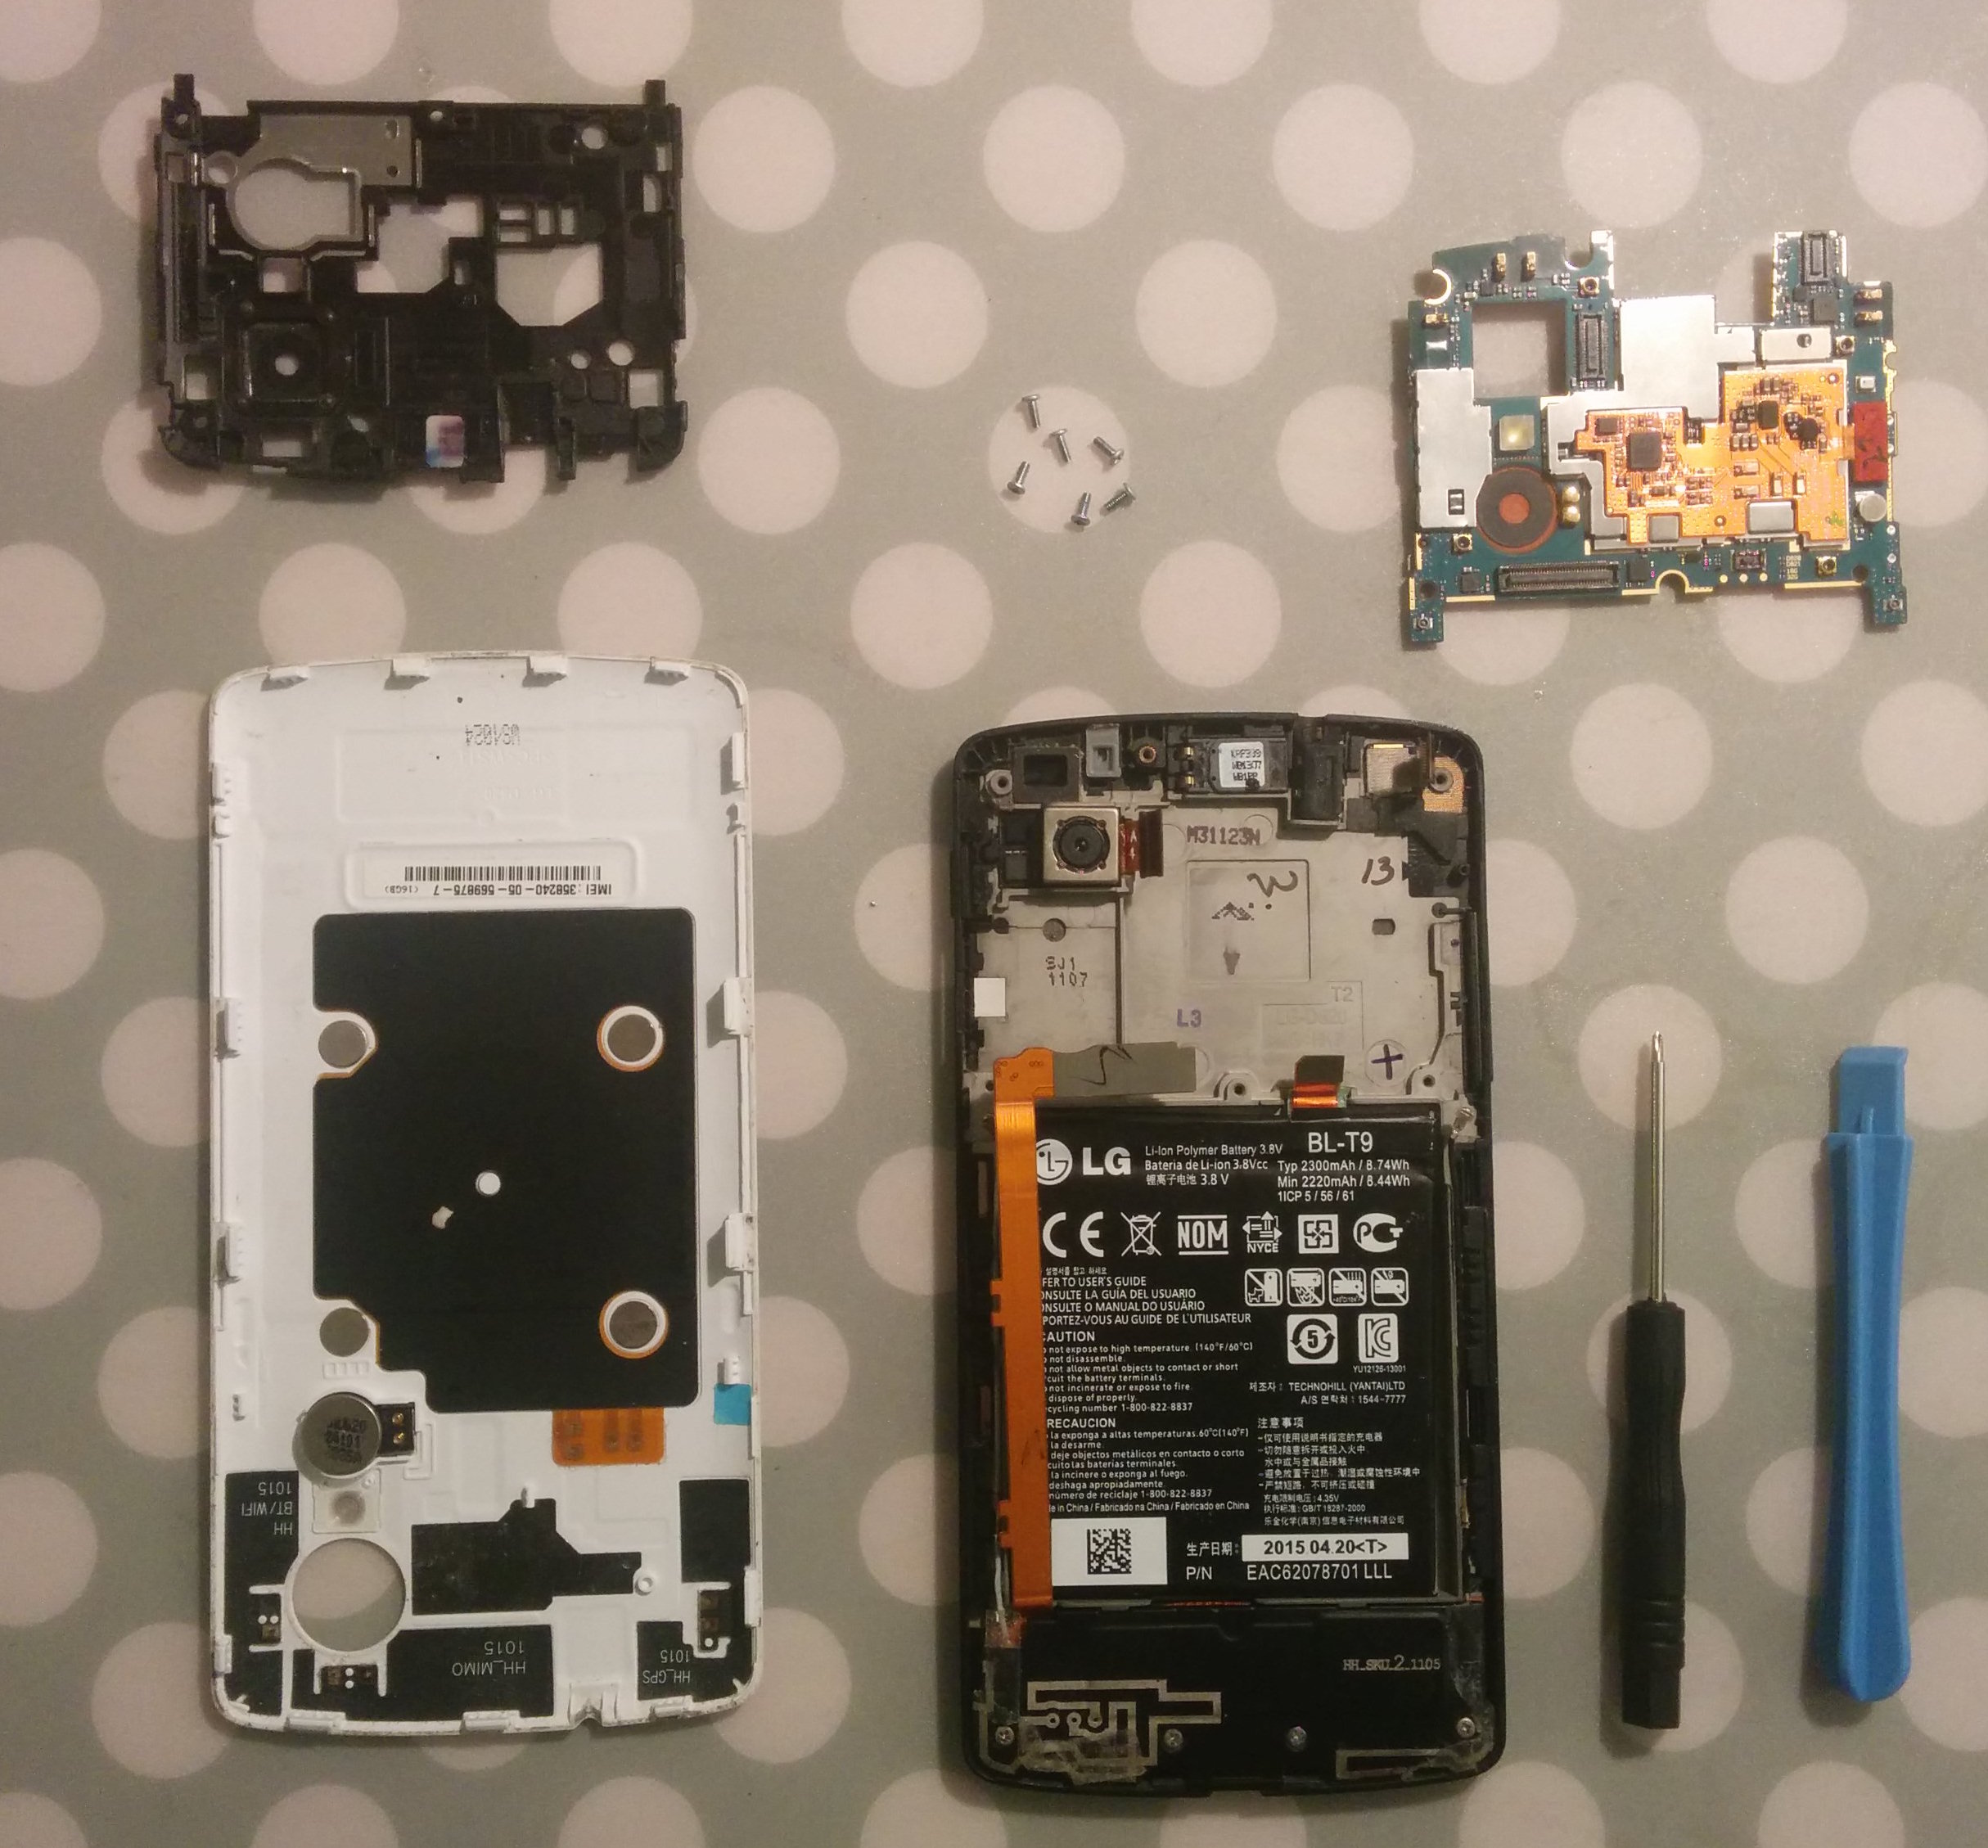
Here's what I was looking at after opening up the phone:
My initial attempt without the Chipquik kit was unsuccessful, but once using that wonder-paste, things went smoothly. Here's a rough idea of what my motherboard looked like after this step.
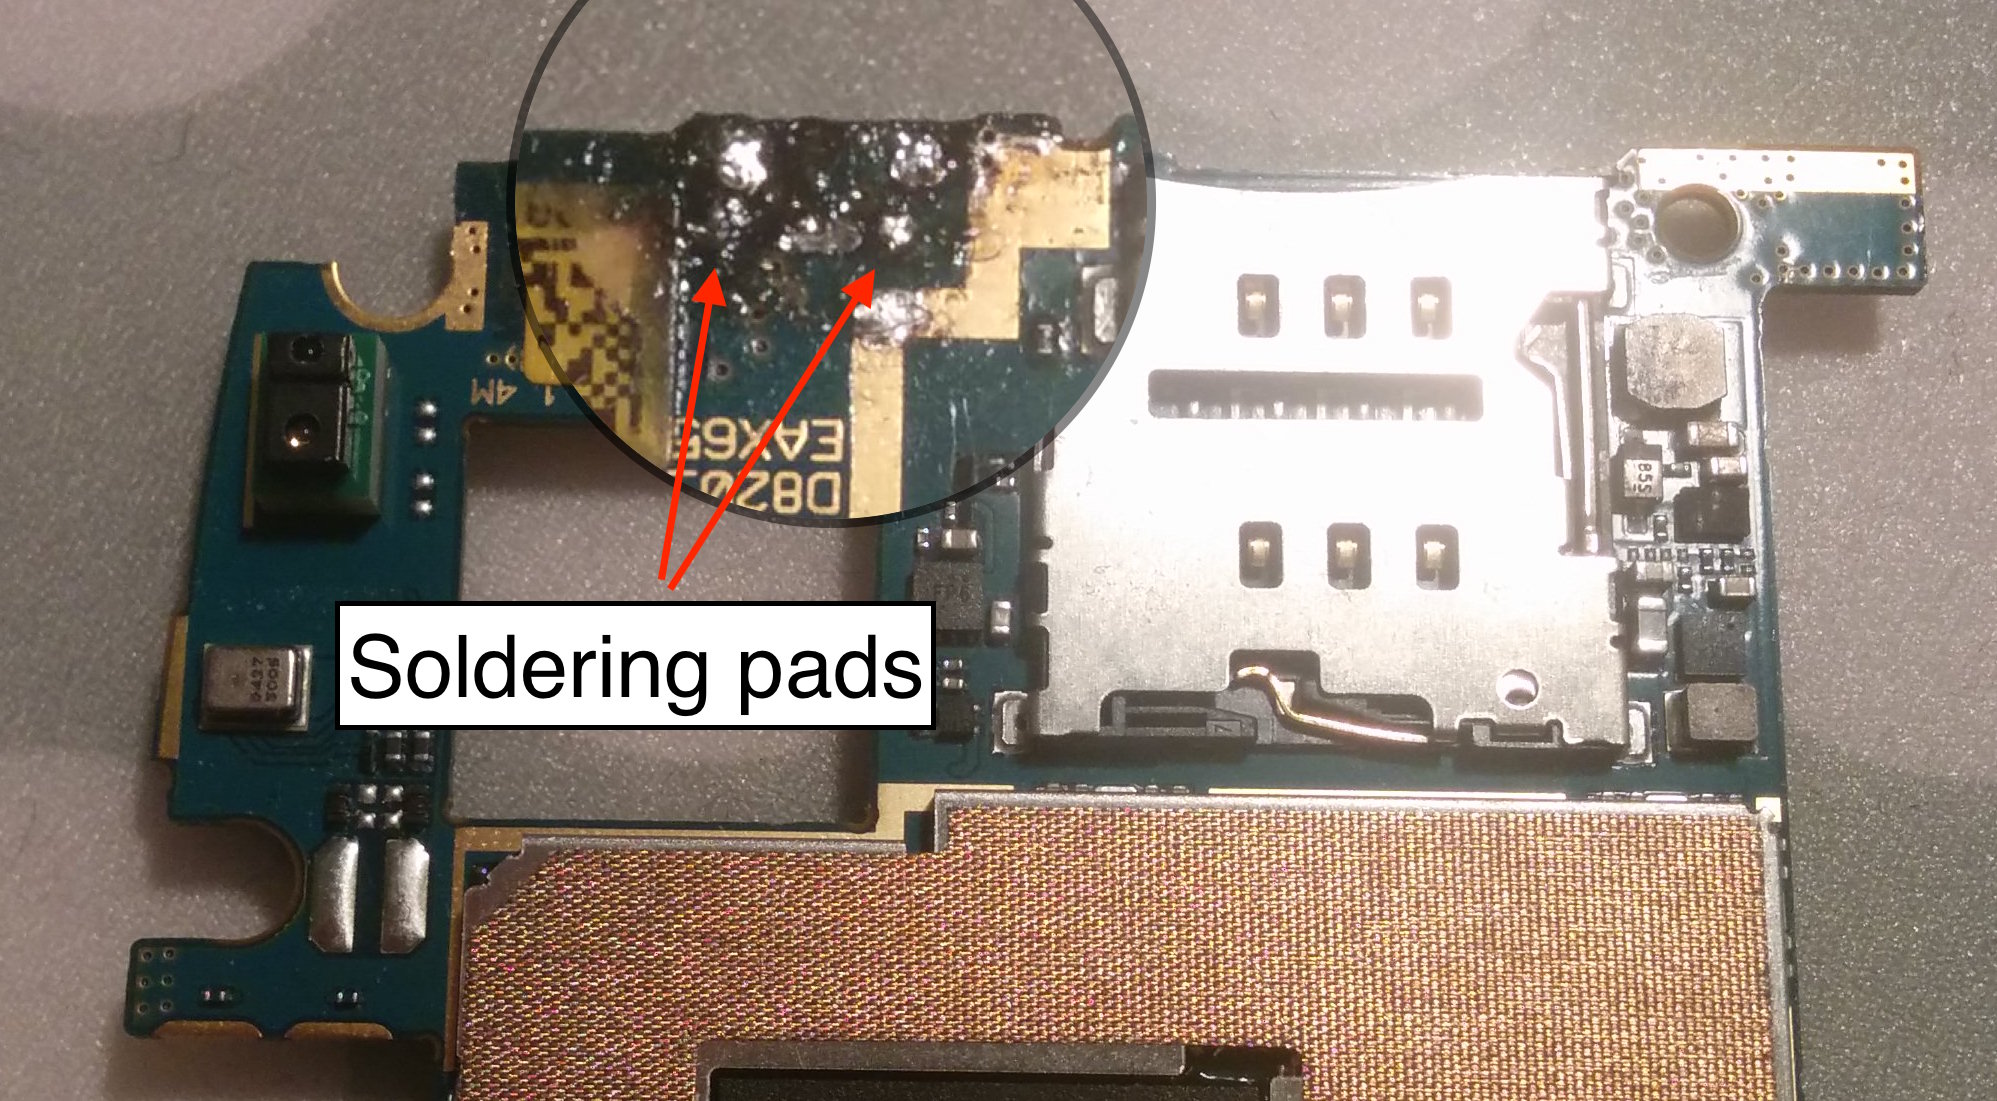
In the image above, you can see I zoomed in on the two pads that make up the electrical switching function of the button. More on this below.
Soldering on the new button
Things got hairy fast when I tried to solder on the new button. To illustrate the result we're aiming at, I took a picture of the working volume up and down buttons and superimposed a drawing from the datasheet mentioned above:
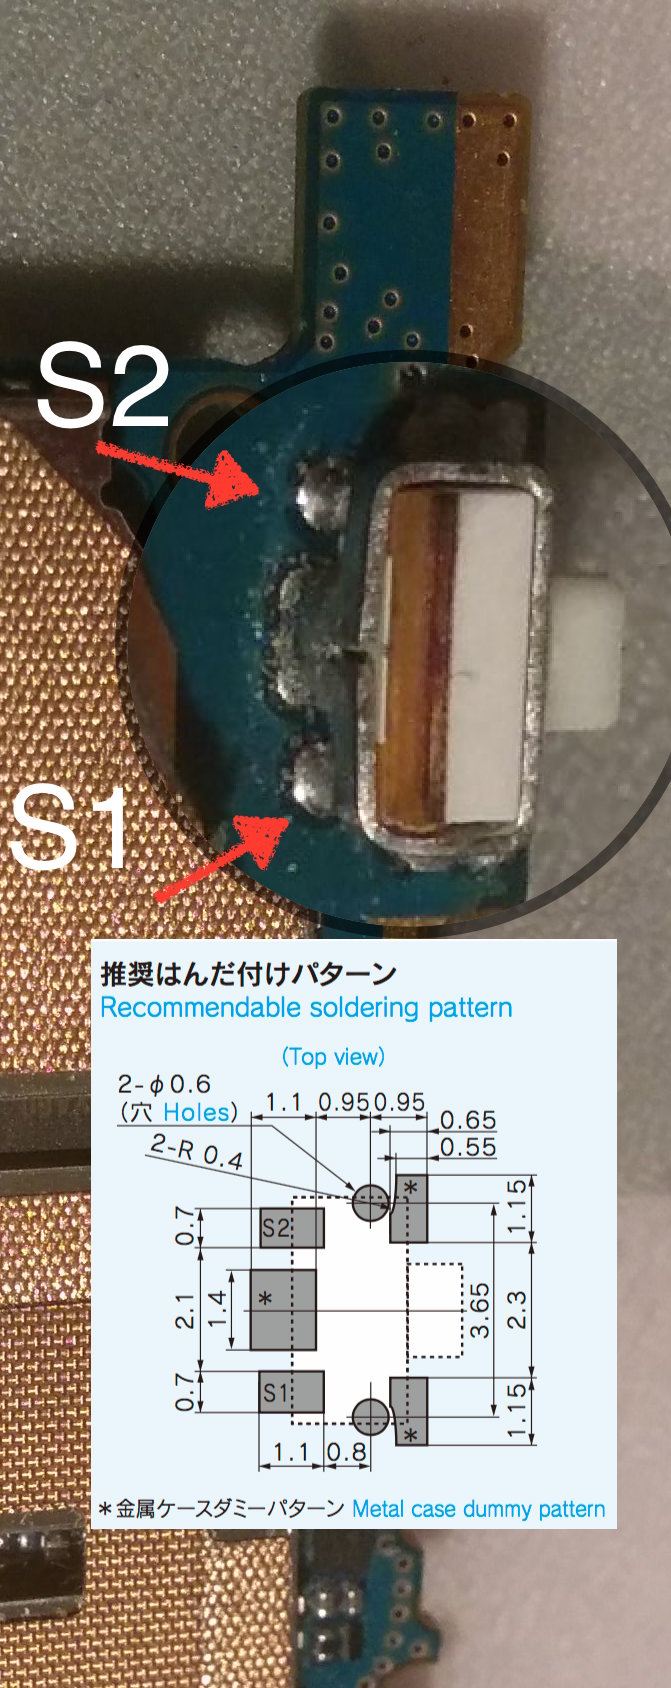
There are a couple of ways to approach this. Either you are aiming for a perfect replacement because you're a skilled solderer and have great tools. In that case you can try to replicate the factory soldering: three spot welds (denoted by a star in the above schematic) for holding the button and two for the connectors. In my case, with little prior welding experience (I asked myself many times in the course of the reparation why I was even attempting this), I downgraded my target to two front spot welds for holding the button and two for the electrical switch. My non-skills led to several botched attempts. I ended up buring the pads of my Nexus to the point where I had to switch to my girlfriend's dead Nexus to achieve a repaired state. The power button actually has two little spikes that help it into the right position. The motherboard has two holes for this. I recommend cleaning these locations so that they look like the second image below (screenshots from the quoted YouTube video):


Finally, I ended putting just a little bit of solder on the tip of my iron and applied it with extreme caution so that I could visually see there was a link between the pad and the button connector.
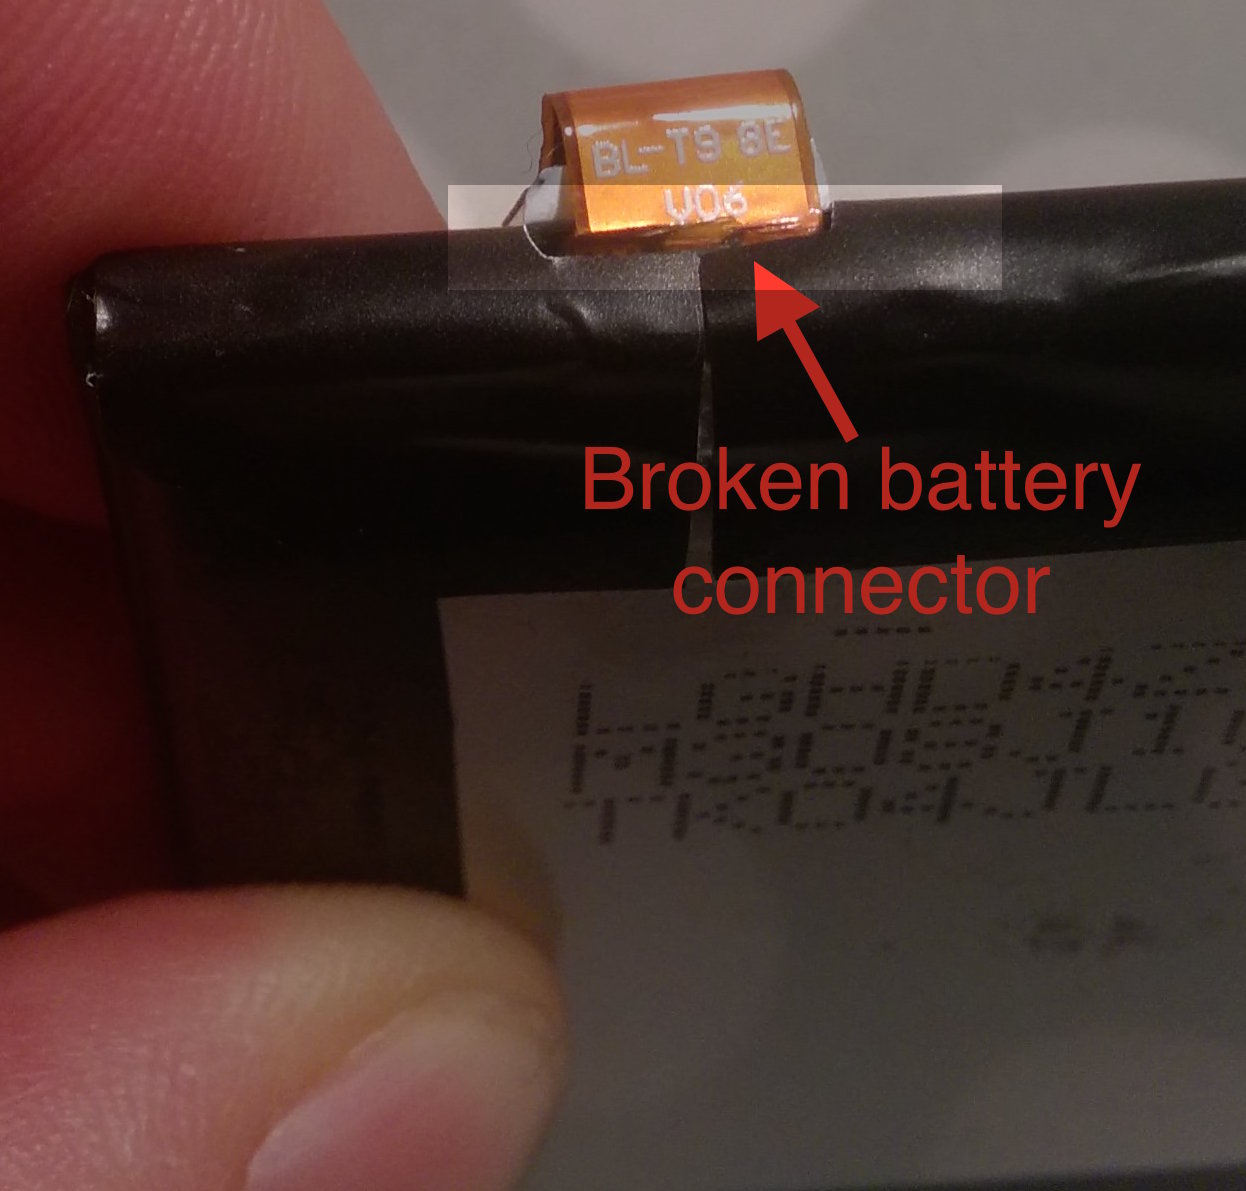
Having no multimeter, my only testing method for checking if the repair was ok was to plug the battery back in and try to start it. This actually led me to break two battery connectors.
Luckily, my girlfriend still had a spare, so in the end I had a fixed Nexus 5. Success!
Conclusions
I'm amazed that the repair worked. It's quite simple to understand how to fix the Nexus power button, the only problem lies in the practical part... If I had to rate this repair task, I'd put it between hard and impossible, depending on your previous experience. But it's fun and I learned many things.
Special thanks to José and Elida for support.


